
Modding the MC202 - Proper CV/Gate inputs - MIDISo I decided I wanted more from my mc-202. The internal sequencer is both hard to use and antiquated in terms of load/save abilities. I wanted to control the 202 from external sequencers. I also wanted to use the 202's great analog section in new and interesting ways. I started looking around the net for midi conversion kits and after checking out many options, found Cykong's mc-202 modding page which explains how to add several cv/gate mods to your 202 with only a handful of parts (around $20). Ok, very cool. But, this only gets us 1/3 of the way there. It _only_ tells how to add CV/gate inputs to the 202 (in my case, 10 jacks). Now that's some great flexibility we didn't have before. But what about the other 1/3 of the way there - the MIDI part? There are several commercialy-available as well as DIY-kit midi2cv converter products out there with various levels of features and expense, one of which is the midi2cv kit that Cykong built, which is sold by Marc Bareille, called the MCV876-4CV (the others I checked out are either too expensive or have limited features). The Bareille MCV gives us 4CV + 6 Gate/Trigg (actually 4+3, I'll explain later). Ok, great, sounds like we have a solution for midi2cv. I will first add the Jack mods to the 202, then the MCV later when I have time (update: added midi2cv section below). I can always control the basics of the 202 (note on/off/pitch) with another synth that I have that has both midi-in and cv/gate out, this is kind of an expensive midi2cv, but will hold me over until I get ambition to complete the MCV. |
Hear a demo: In these clips, we're using MIDI to control Note / PulseWidth / Cutoff / FilterMod / Accent / Portamento all at once on the 202. |
New jacks for the 202
I started by planning the project, which includes: reading cykong's guide, reading Bareille's website, and planning where the cv/gates will connect. I decided on just 10 of the Cykong mods (all input jacks, no output jacks). I then built a parts list for the mods in the Cykong guide. I wrote my notes creating a sort-of custom recipe to mod my own 202 in it's original case.
My "recipe" is essentially Cykong's guide with some of my own notes scribbled on it while planning and implementing the project - it's my own custom 202 mod guide.
If you're modding a 202 in it's original case, I recommend reading my changes to the cykong guide... It contains the 10 mods I've added, as well as a BOM (bill of materials) and parts lists for each mod and some notes about individual mods where I thought it was unclear.
So after sourcing all the parts from Mouser and reviewing cykong's mod guide, I was ready to begin... I did the mod in a weekend, which took about 10hrs total, split between 2 sessions. The first session was dedicated to carving out the case to accept the Jacks and ToggleSwitches; and to making sure the entire case fit well when put back together. This was a precision job! Then, the 2nd session was dedicated to wiring and putting heatshrink on the wires to make sure the tight fit inside didn't short out, though there's really only a few places that could short out, since it is such a tight fit I didn't want to take any chances.
Fitting the toggles was easy, while fitting the jacks was very very difficult, but all of this went fast and easy (5hrs) since I measured well, and I had the right tools for the modification (dremel!)... Wiring was straight forward and simple after understanding Cykong's diagrams.
Parts list for mc-202 cv/gate mod
I decided to do only 10 of cykongs mods, and luckily that's just about all there is room for on the back panel of the 202 case. If you're creative you can probably fit in a couple more, but it'll be more work with the dremel grinding away plastic...
Mods I chose were: CV/GATE/CUT/PW/PORTA/VOL/ACCENT/MOD/VCFINSERT/VCAINSERT.
The SPDT (on-on) toggles control PW (CV/INT), CUT (CV/INT), VCFMOD (CV/INT), ACC (VCA+F/VCA)
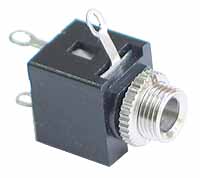
| (10 jacks) For Jacks I used this Kobicon 3.5mm switched mono phone Jack (plastic and metal) from Futurlec ($.50USD)... also available from mouser. |

| (4 toggles) I used SPDT sub-miniature toggle switches in this mod. I found some at Allelectronics for a about $1.25ea... eBay has a circuit bending store, and mouser and futurlec carry sub-miniature toggles as well... |
| (100k resistor.) A few of the jacks need this. |
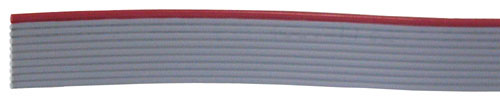
| (Ribbon cable) 28 AWG stranded wires (flexible without breaking). Pull this apart to get individual wires... |

| (Heatshrink tubing.) Good for insulating any bare wire or jack/toggle terminals. |
Preparing the case
The case needed to be drilled and ground (and horribly abused) before it would accept the cv jacks and toggle switches. Since cykong installed his mc-202 into a rack'd case, I had to find the best way to modify the case on my own. (This is the other 1/3 from the introduction for those of you keeping count)...
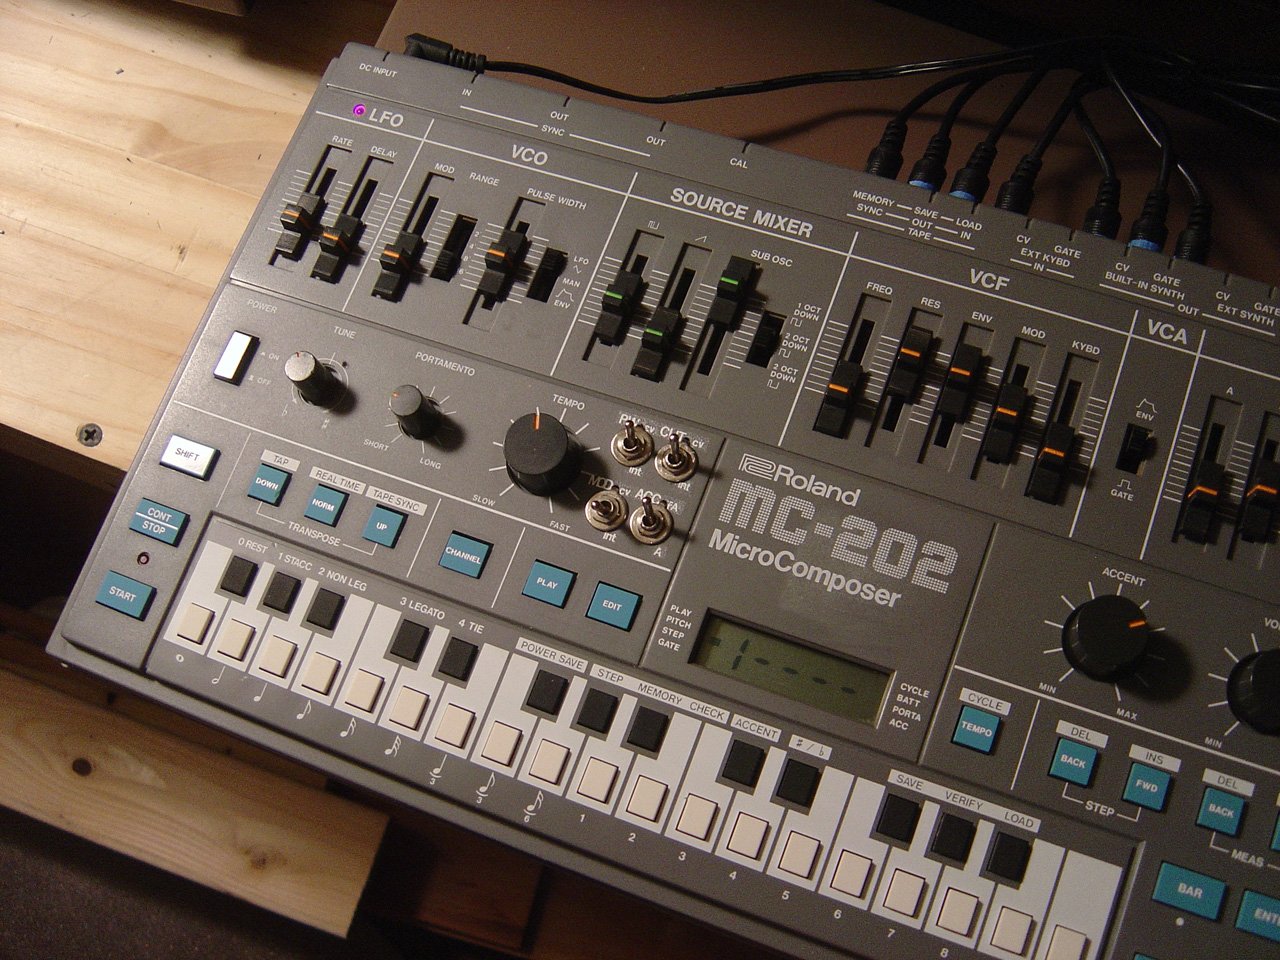
I've installed 10 1/8" jacks and 4 toggle switches onto my mc202. For the jacks, I put them between and below the 8 jacks already on the back of the 202... For the toggle switches I put them to the right of the Tempo knob (which is the only place that has any clearence below it AND blank space on the control surface).

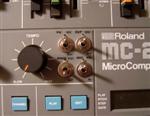
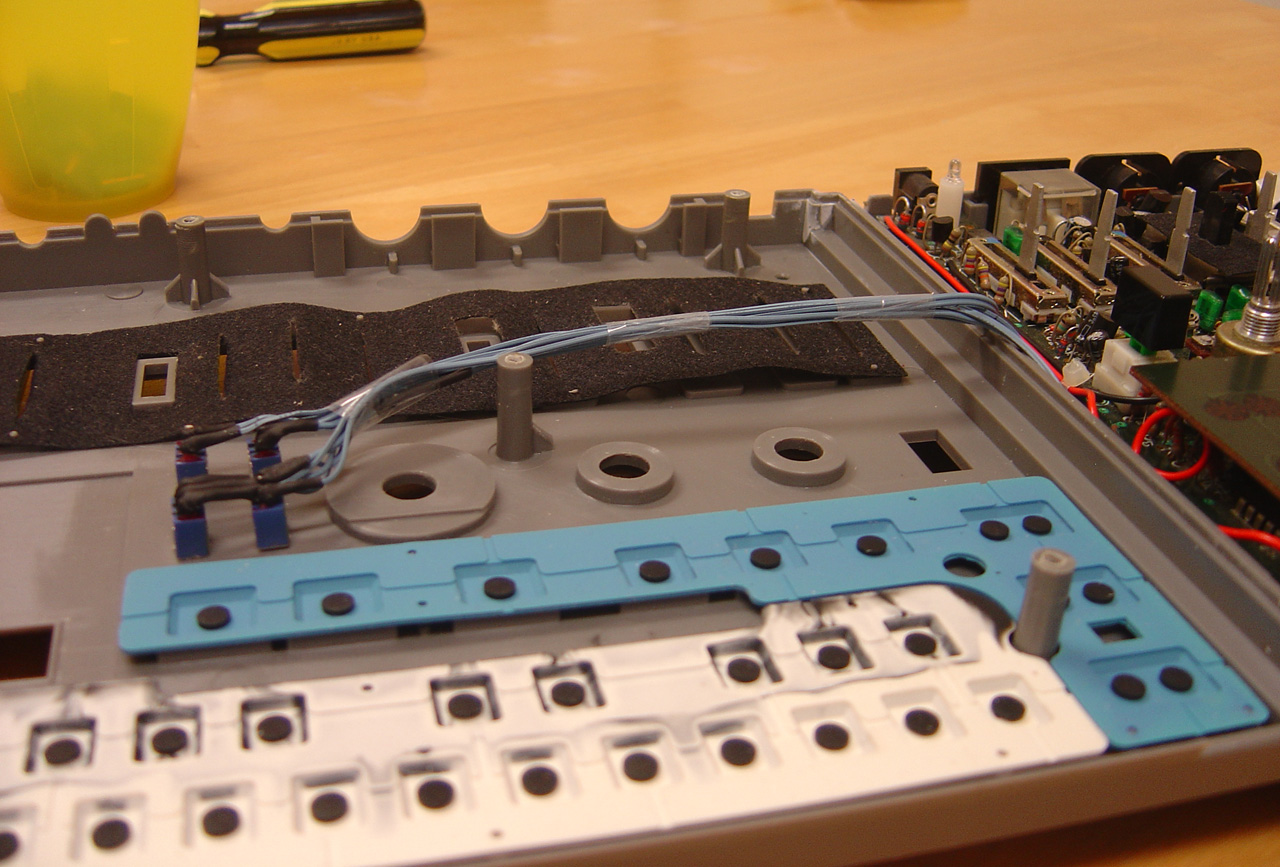
Work in progress, here the case is cracked open,
and jacks and toggles have been installed, read on for details...
Drilling holes in the back of the 202 for the 1/8" cv/gate jacks:
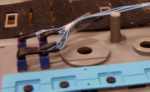
Naturally, there isn't enough room to insert more jacks between the pcb and the bottom of the case (why o why do inanimate objects hate me so?). But there almost is... and I used that fact to my advantage. I ground out some of the plastic on the bottom half of the case (it's sort of a narrow ledge), and I trimmed off low hanging contacts on the PCB (the hershey's kiss shaped things on PCB boards holding the components in).General procedure I used to add 10 1/8" jacks on back the 202...:
- - Use a pencil and ruler to mark where the pcb is on the back jack panel, and where the contacts hang down to, mark another line for centerpoint where I'll be drilling the holes...
- - Use a awl - a pokey screwdriver thing for poking a hole before drilling pilot hole
- - Drill 1/8" jack holes into the 202 case back using 2 bits (a tiny one for pilot hole, and a bigger one that fit the 1/8" jack)
- - Grind away inside case just below each 1/8" jack hole with Dremel using 2 bits (one with a BB sized metal head from easy grinding out, and one with a square head for routing out the inside corners for a good fit). This allows the 1/8" jack to sit lower than was possible before, allowing room for the low hanging PCB.
- - Snip of excess PCB contacts (the hershey's kisses mentioned before).
- - Grind off, round off, excess PCB contacts using dremel with cone shaped sanding bit... (but not too much)
Both bits were BB sized (i.e. like a BB gun's bullet), both metal, one was a sphere, one was a cylendar... Probably helps they were new (or not used for the several years that I've owned them)... Overall I ground out maybe 2mm deep to accomodate the 1/8" jacks (I told you this was a precicion job, it really didn't fit together without that 2mm!)...
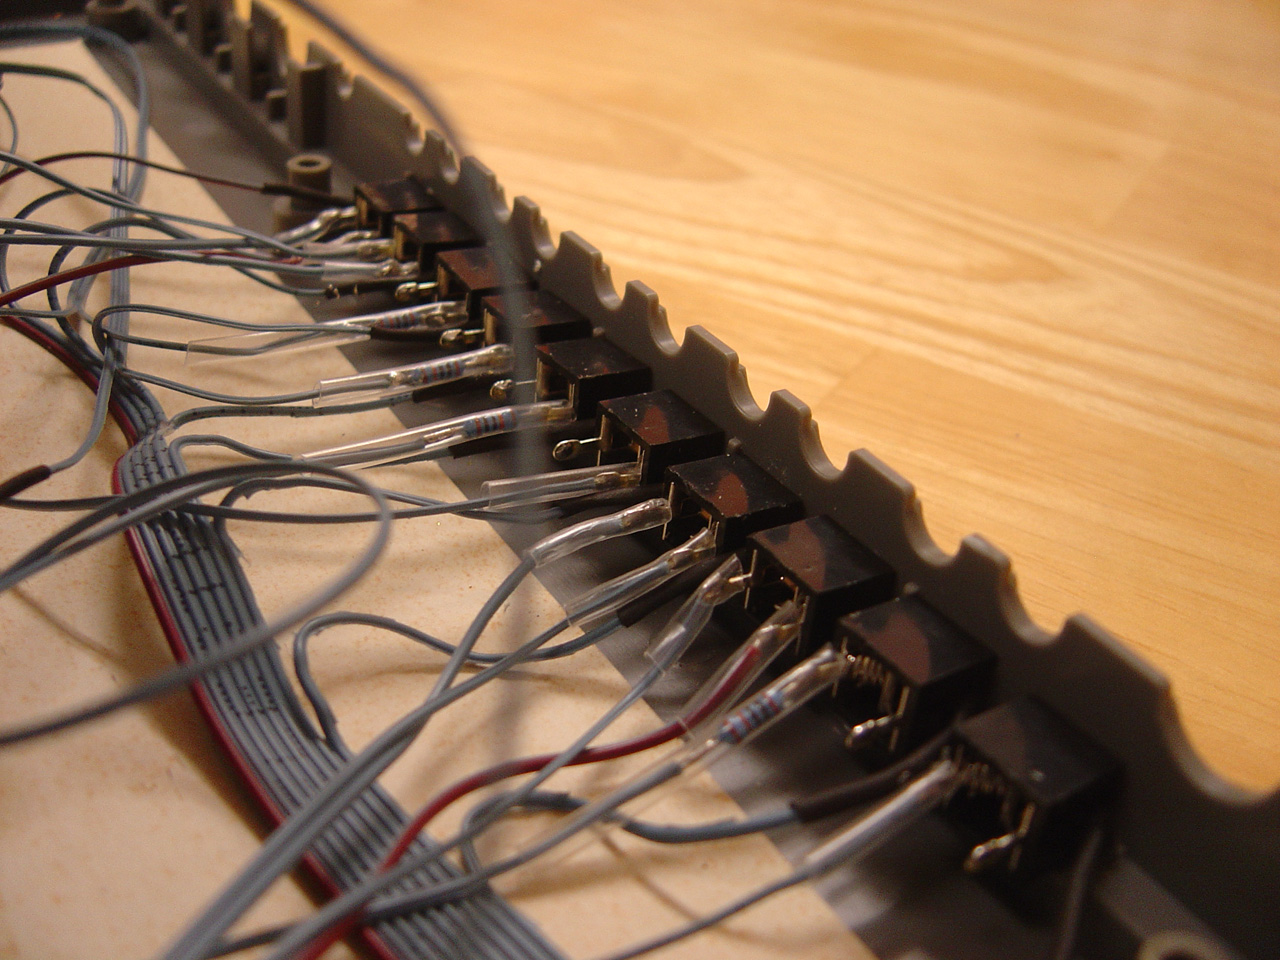
Interior, cv/gate jacks installed (shown later, after wiring)

10 new Jacks, cv/gate is shown plugged in.
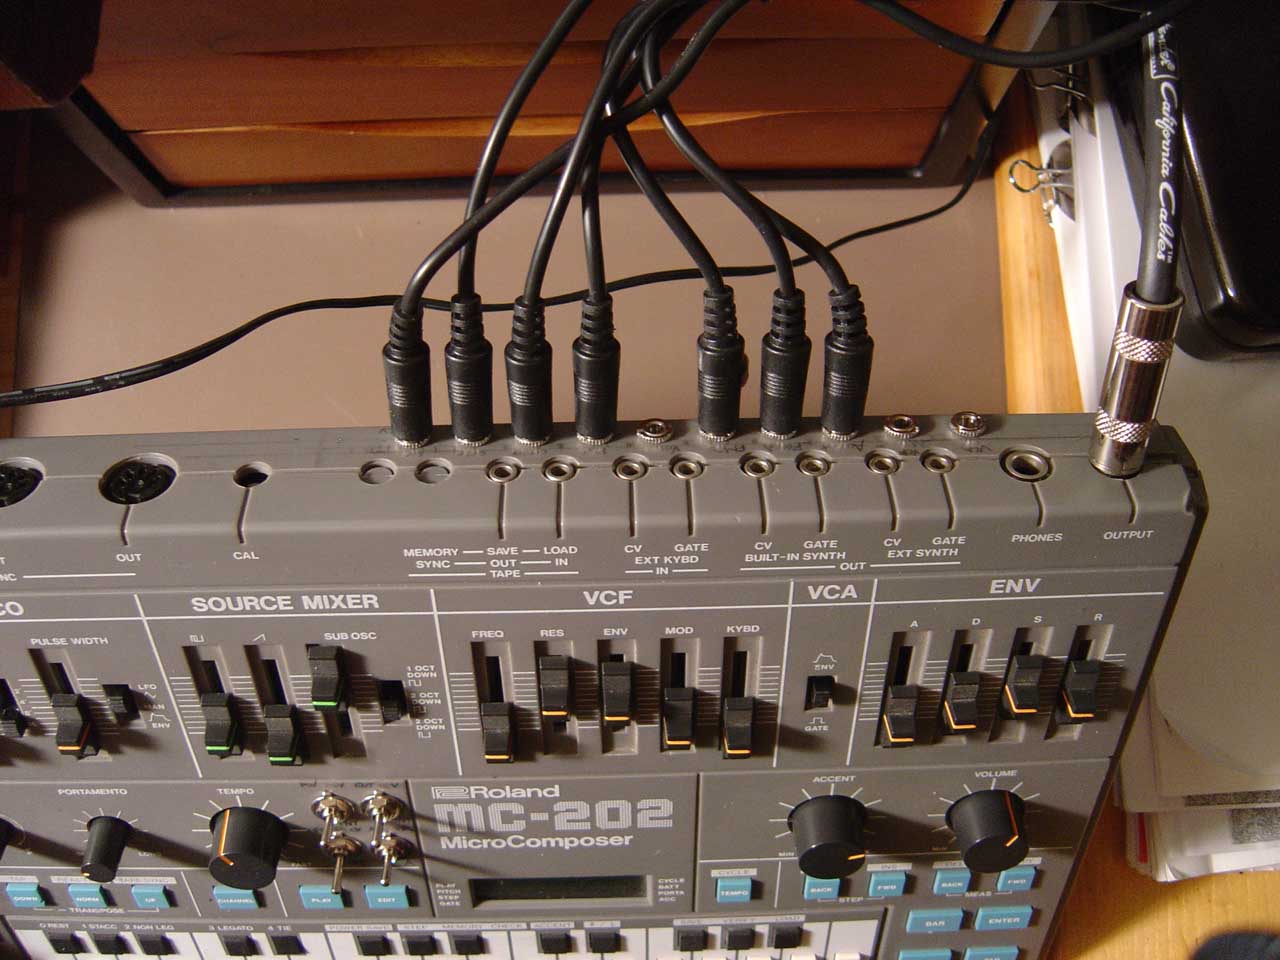
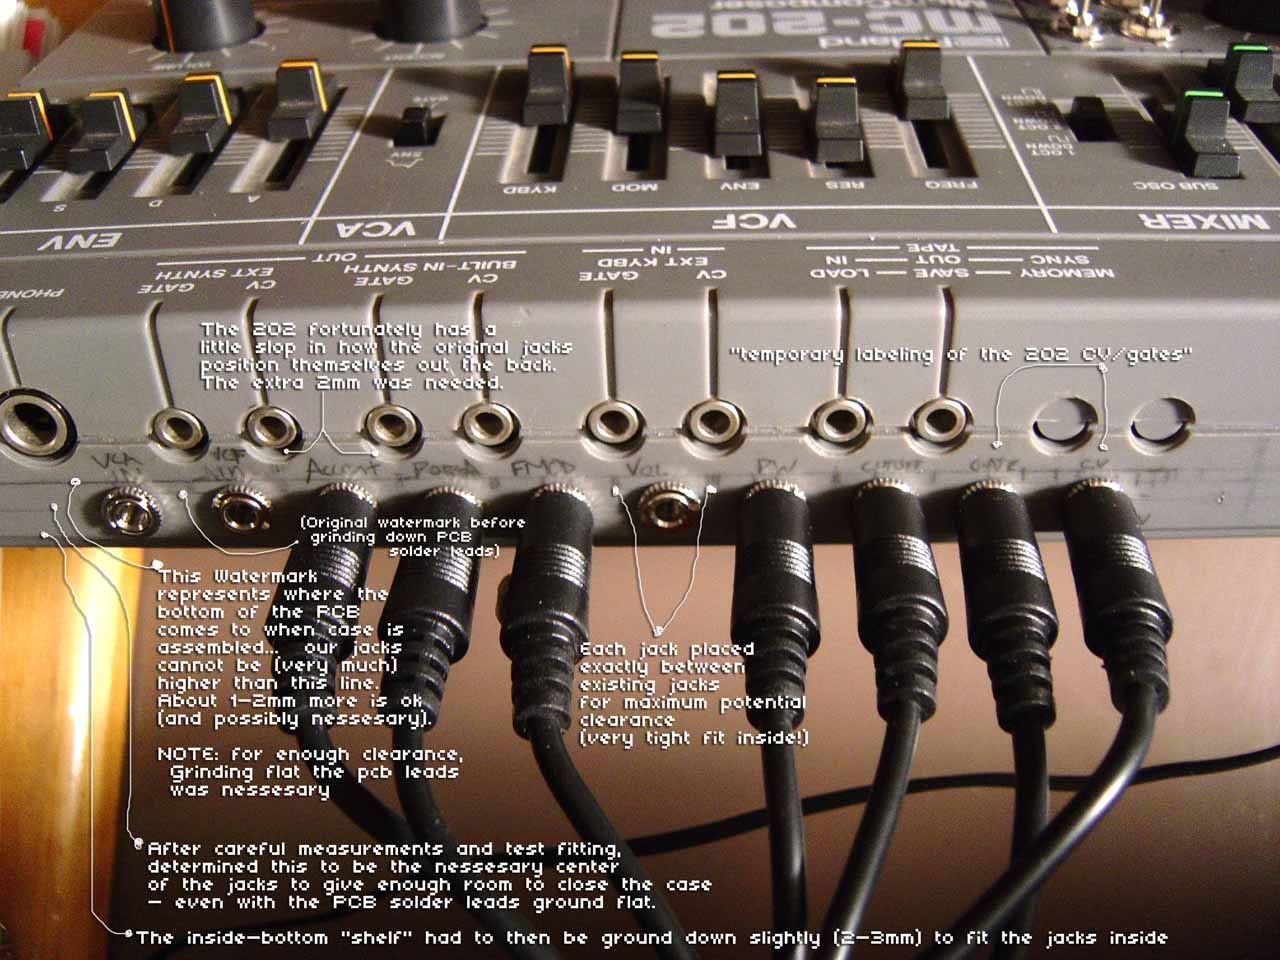
Close up of 10 cv/gate jacks -> with text captions
For the toggles:
General procedure to add 4 toggle switches to the right of the tempo knob:- - mark with pencil where to place each toggle switch. Think about 1.) clearence, 2.) even spacing and 3.) room for lettering. 4.) clearence!! Between the 202 lid and PCB there really only one place to mount the switches - to the left of the display - unless you put them on the top or side somehow... Be very careful here, it's a little tight, and I had to smash down some of the components on the PCB as well as the leads from the switches. I also placed a thick piece of insulating tape (or several layers of tape) onto the PCB components so the switch leads wouldn't make contact. Also beware of the clearance and positioning of the toggles, you can easily place the toggles so that when you close the case they hit the PCB "shelf" or any of the components. It's tight! but it can be done. See picture for approximate spacing, and then measure on your own to be completely sure it will work for you.
- - make a dent with an awl
- - then drill a small pilot hole
- - then drill the switch sized hole.
- - On my switches, there was also a top plate with a protrusion to lock the toggle in place (from rotating). Measure where the protrusion fits, and then dent the spot with an awl, then drill a hole for it to insert into.

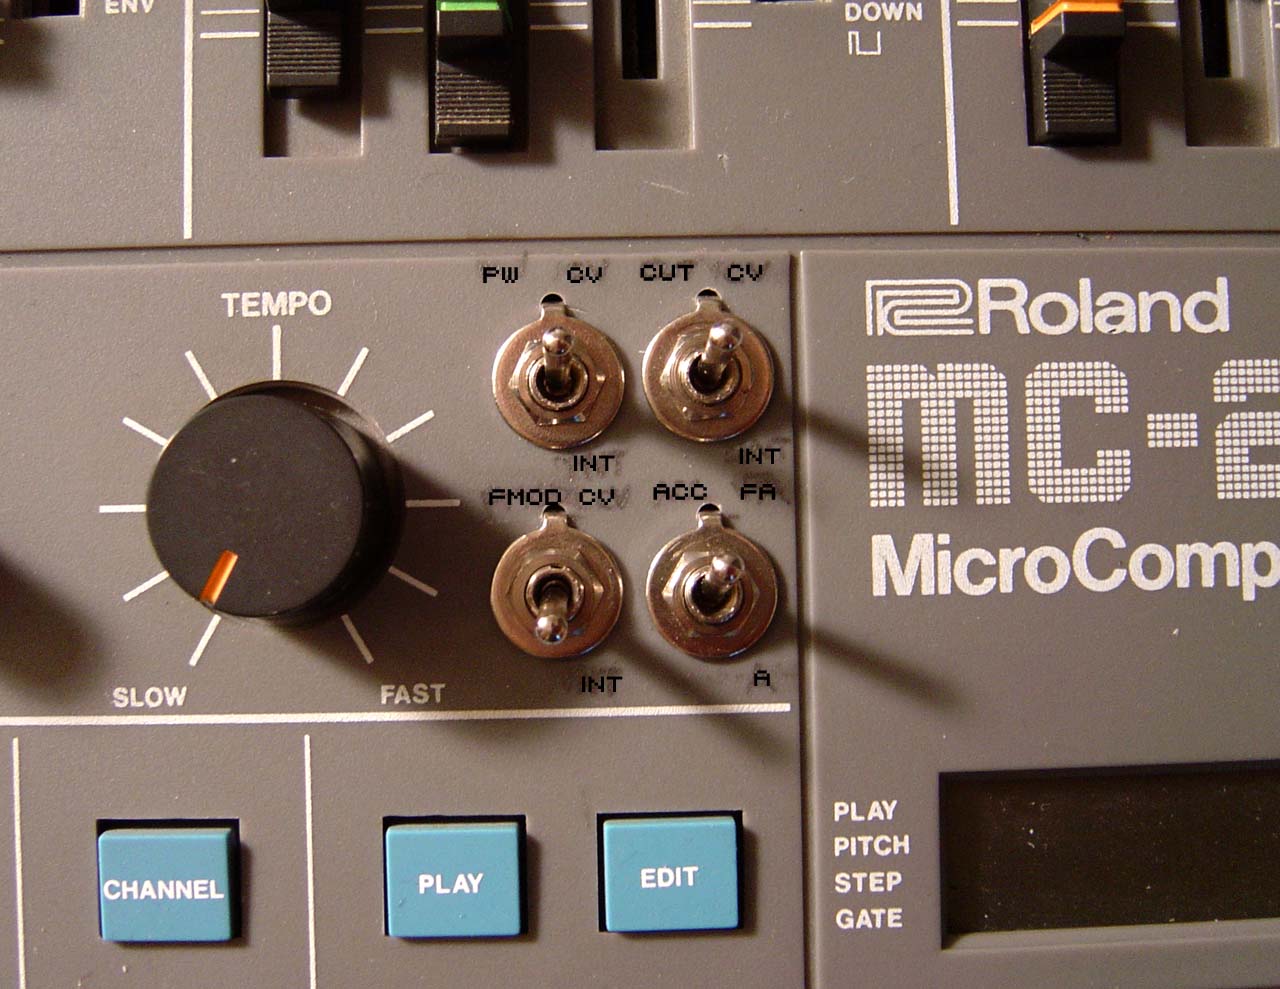
4 new toggle switches:
PW (connect jack / internal) CUT (connect jack / internal) VCFMOD (connect jack / internal) ACC (vca+vcf / vca)

Wiring the Jacks and Toggles to the mc-202
Now that the jacks and toggle switches were mounted to the 202's case... They need to be connected to the 202!
Here, I followed my edited Cykong mod guide for 10 of the mods: CV/GATE/CUT/PW/PORTA/VOL/ACCENT/MOD/VCFINSERT/VCAINSERT. (adding all the optional switches and switched jack input configurations for these).
General procedure
- - use dremel to cut traces (metal pointy cone bit the size of a "BB" ball), more stable to handle this way, I always slip using an xacto knife...
- - use heat shrink to cover ANY exposed metal, toggle/jack terminals, resistors, etc...
- - use enough wire to let you work easily on the case... I used one length for under the PCB to the jacks, 2x that to go from the toggles around to the underside of the PCB...
- - carefully understand and plan each step, including 1.) where you want to route your wires, 2.) how the feature is switched on/off (jack or toggle, or always on).
- - be mindful of how switched toggles work. there are 3 pins: 1 is ground, and 2 are switched, and polarity matters!! use your continuity tester to determine how the switch works. (jack out - the 2 are connected; jack in - one connected to jack, one disconnected; see, polarity matters!)
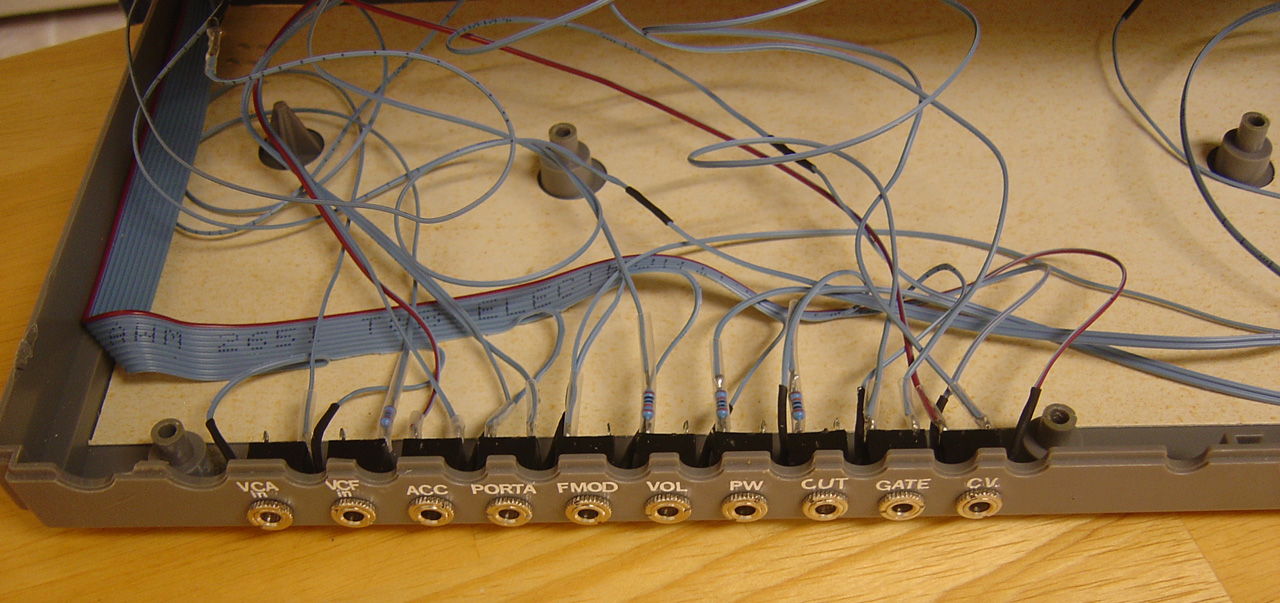
Interior, cv/gate jacks installed, (shown after lettering was
added)
Remember - polarity matters on the 2 switch pins!
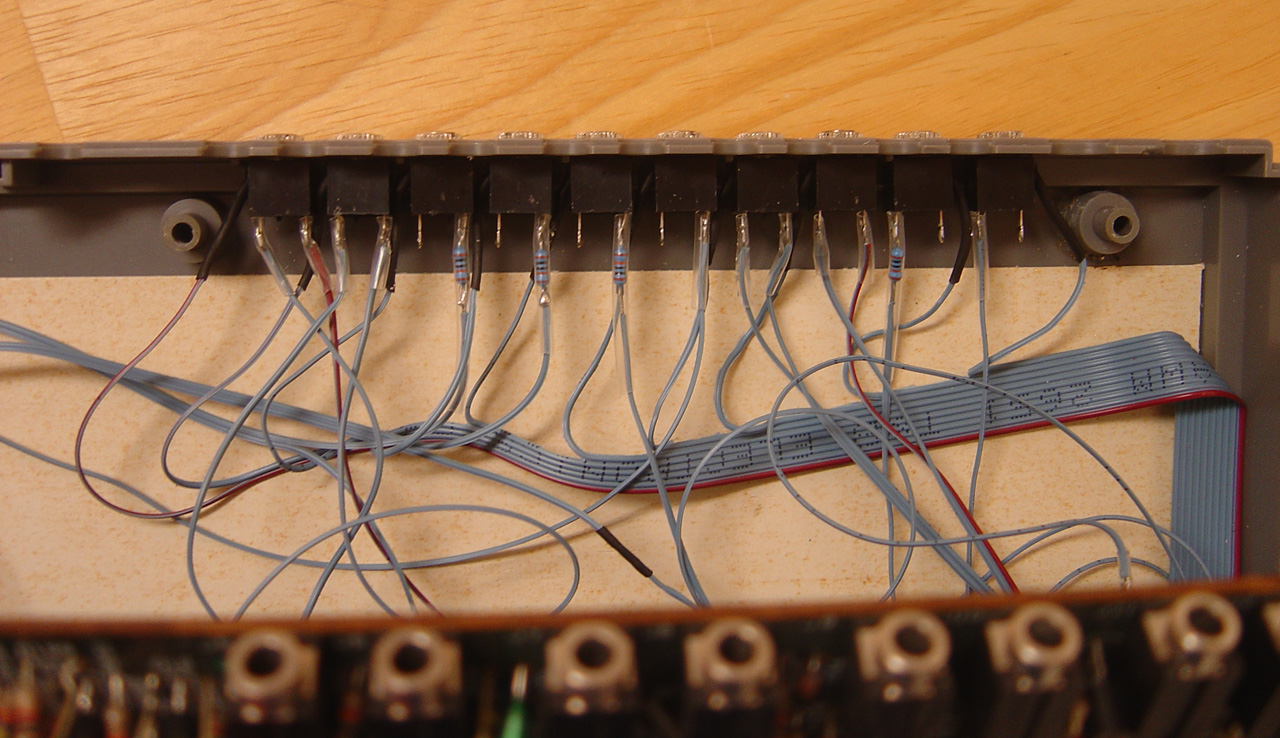
Interior, back of the toggle switches (wired).
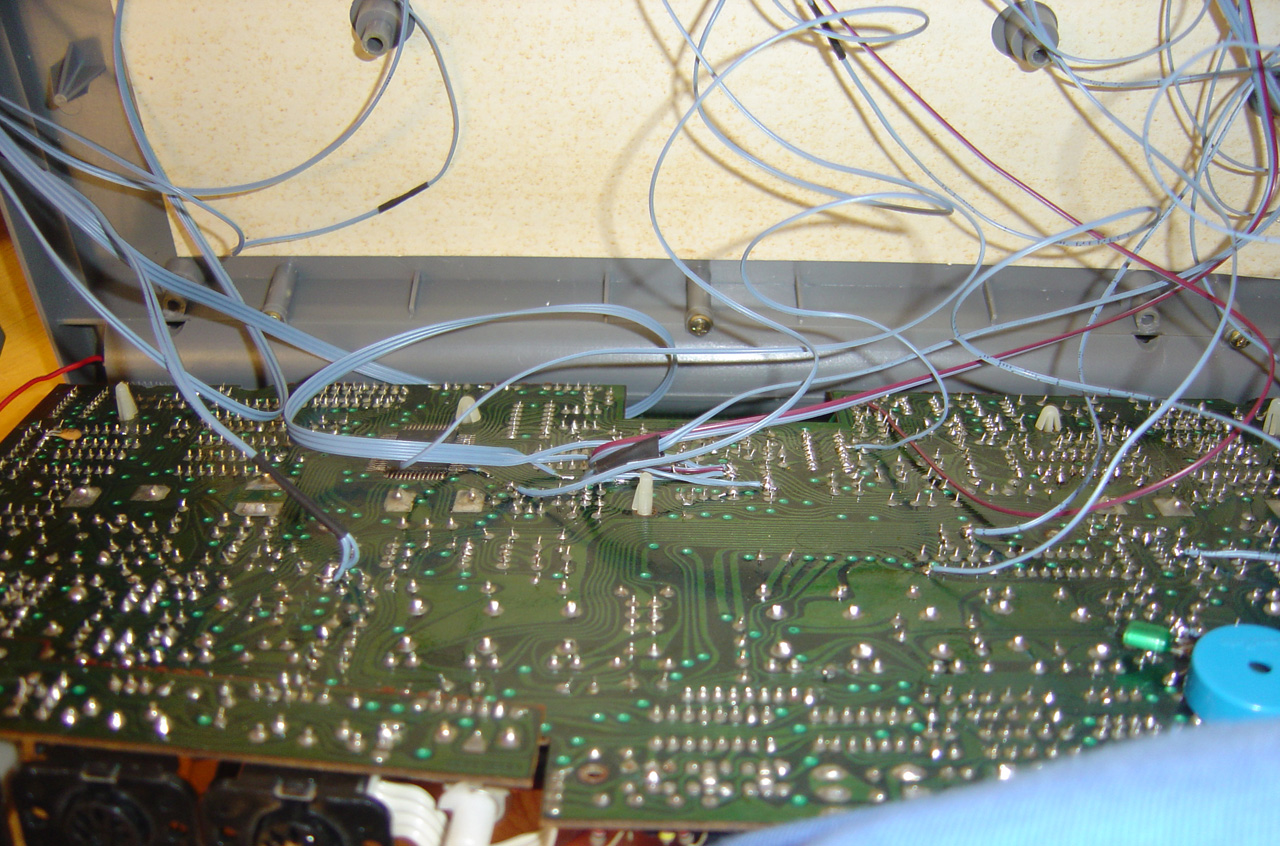
Interior, circuitboard wiring. This is what it looks like to mod a 202, on the inside - what a mess!
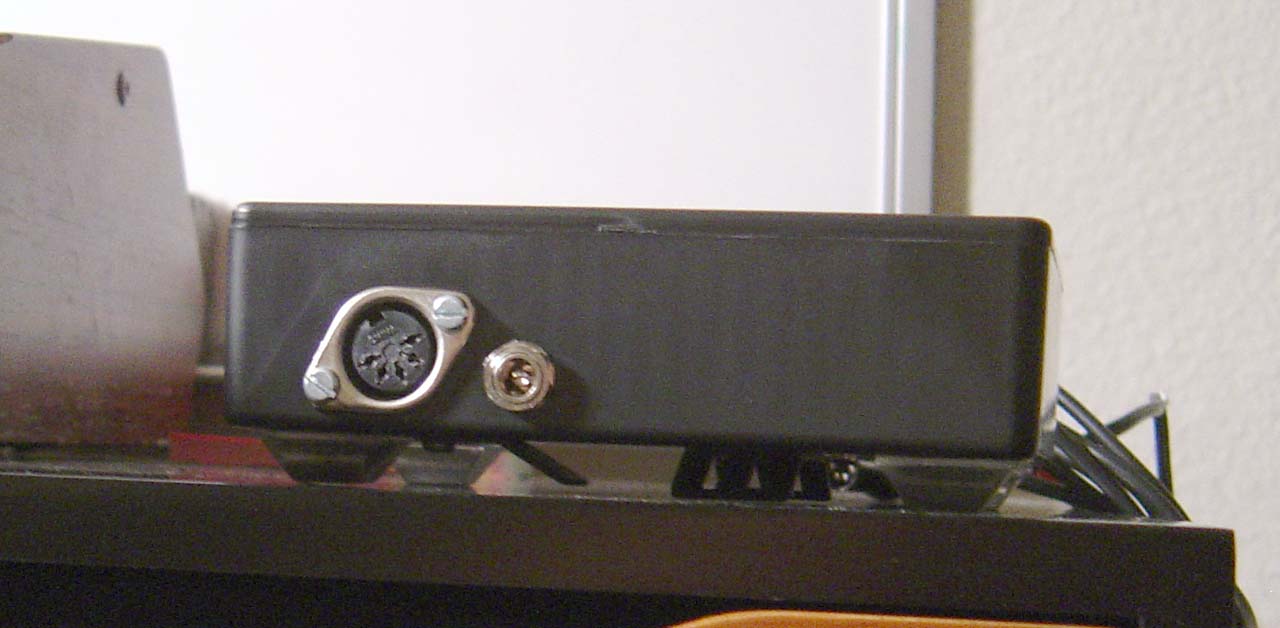
The Midi2CV - Bareille's MCV876
So after sourcing/ordering the parts, and having them arrive, I thought the midi2cv would take another weekend, but it turned out to be much longer. The unit itself was built very fast. But then there were some problems with high frequency noise that I had to track down and minimize.
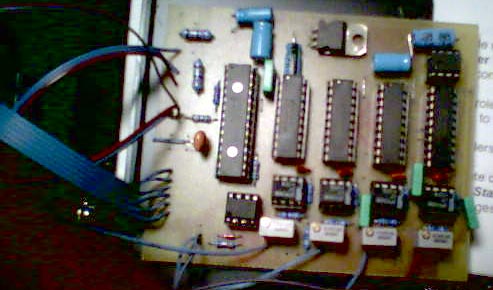
MCV876 Work in progress.
The PIC is the long IC to the left.
The 4 trimpots along bottom are for the CV calibration
Power. I found out that the MCV doesn't give any design or suggestions for power supply. Rather it assumes you'll leech off "your modular synth's power supply"... Which of course is outside the scope of this little project of mine... :) So I set out to find a power source.
What I chose was determined by the project box I wanted to use. The project box had to fit Bareille's PCB board with a little extra room for a PSU circuit. I also decided I wanted a small box - and since the PCB was oddly sized I didn't have many options either. So for the power supply, I went with a wall adaptor, rather than a large and integrated power transformer. I built the following design to regulate my wall adaptor before handing the power off to the MCV board...
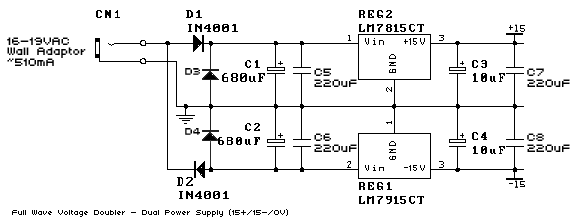
This is the power supply (PSU) for my MCV876 midi2cv.
It is a Full Wave Voltage Doubler with dual output (+/0/-)
It's powered off a 19VAC 510mA wall adaptor from Jameco for $5.
The PSU shown here is solid, verified with a scope to produce a nice flat 15 and -15VDC...
problems, the MCV876 (at first) produced a lot of high frequency noise (above 4-8khz) out the CVs which was then induced into the 202 through the [CV0] pitch control line. After spending several nights exchanging emails with Marc, building alternate PSUs, replacing parts, and using the scope to investigate, I was finally able to get the noise down to an acceptable level (which is just a little noisier than with my x0xb0x cv/gates controlling the 202). I tried using LM1458N's instead of the LF412CN opamps specified in the MCV parts list (the parts list is not public, buy an MCV to see it)... The LM1458N's reduced the output noise considerably compared with the LF412CN's... While this is nice. It's not cool (or expected) that I was getting this noise with the other opamps (Marc says he runs them and they're always quiet in the MCV's he builds). Not sure what really was happening, but using LM1458s make the unit quiet, so I'm not complaining.
Other things discovered while troubleshooting:
- - Through all of this - thanks to Marc Bareille for great email support, wow. :) I now know a lot more about power supply design than I used to.
- - It appears that using 3-pin XTAL instead of the 2-pin crystal
is not a problem... in case you're facing a similar question... just
ground the XTAL around to the back of the MCV on a ground trace
- - I did try a 36VCT transformer based PSU, and got 60hz hum out the 202's line out. Possible ground loop problem? I didn't get the problem with the wall adaptor and since the wall adaptor PSU fits my project box, this is what the MCV uses now...
- - a scope can be very useful. rather than trying random things, you can probe around following noise to the source.
Now with the problems out of the way, the MCV is now built and working, I next configured the MCV firmware with midi control change (CC) mappings that fit well with flstudio and the 202.
     [midi msg]      [202 param]
cv0  note            note pitch
cv1  PB              cutoff
cv2  pan             PW
cv3  CC70            f-mod   (useful when f-env down, f-kybd down, f-mod at 75%)

G0   note            note gate
G5   volume          porta gate
G6   velocity        accent gate
|
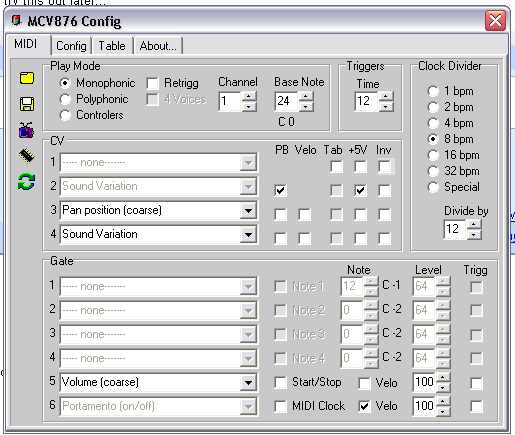
And this is a shot of the MCV config tool (with same configuration)
One final note, is that I needed to buy a JDM programmer for the MCV's PIC processor (Microchip brand). I found one for $15 on eBay. There's also a few schematics for building your own on the web... The one I found was pretty cool, and came with all the tools, compiler, burner, docs, etc... and what was best was that it burned the chip the first time I tried... wooo!
ok, a final final note. Beware that the MCV876 4CV + 6Gate is not actually _6_ gates!!!. In monophonic mode (which we want for the 202), you only get 4CV and 3Gate... Marc said this is because of performance reasons, and could theoretically be enabled in future firmware releases as long as you don't swamp the PIC with midi messages... I'm holding my breath for a new firmware... :-)
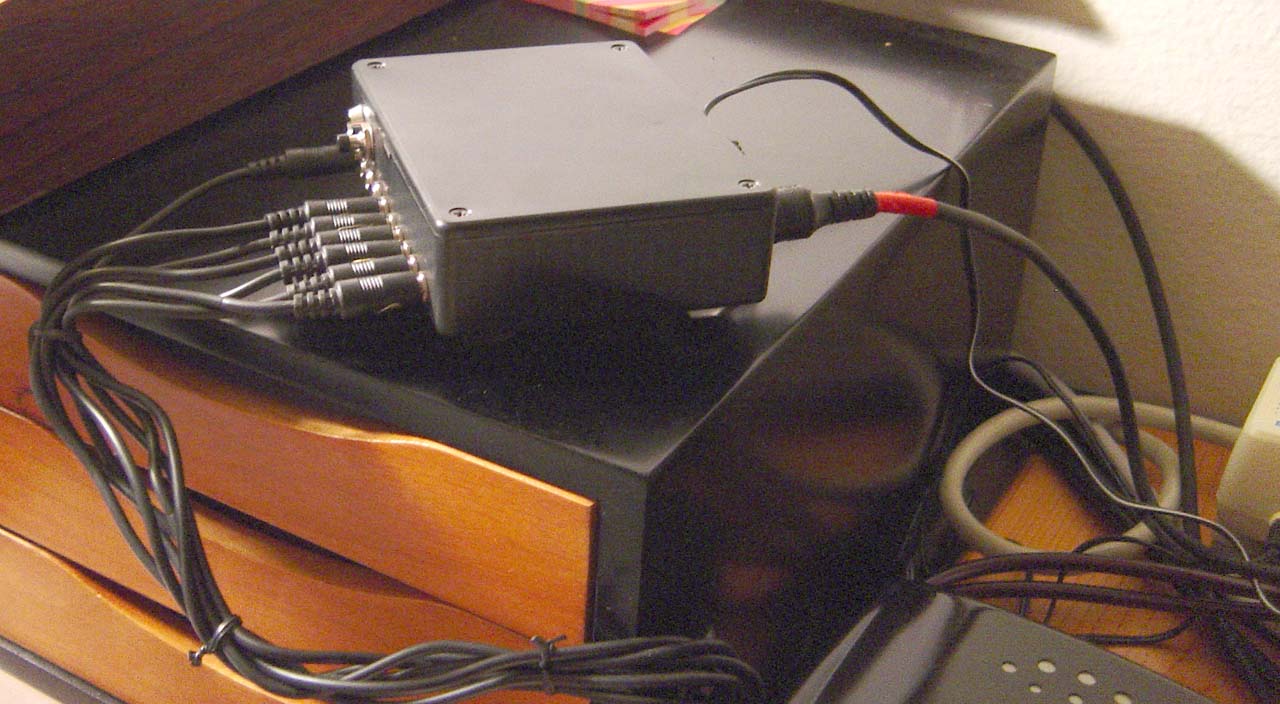
The Finished MCV
Hear the modded 202 being controlled by the midi2cv:
The midi2cv+modded202 adds another level of control and automation to the Roland MC-202, it's a tweakers dream... I can control several (5) params in the 202 from any sequencer, while still tweaking sliders on the 202 in real time if I wanted. Very cool...
Closing comments
So the 202 modding was not too difficult, it took a total of 10hrs spread over 2 days, with a mildly stressful part getting the Jacks to fit at all. If you don't have the tools or aren't good with tools, you might mount your jacks in another position (battery compartment maybe?), or find smaller jacks than I did. Planning here is key, and I lucked out and was able to grind away part of the case to fit the jacks.
Afterwards, the 202 sounds really cool. All jacks work as expected, and I've gotten some really interesting sounds running an external sequencer into the 202's gate input, while using the 202's internal sequencer to control pitch. It's gets a kind of chaotic but rhythmic thing happening. I'm sure I'll find more interesting things to do with it later... The real fun is controlling all params at once via midi while tweaking the sliders at the same time.
Building the midi2cv was very easy and straightforward, however, there was some noise in the circuit coming through the 202's audio outs... Tracking that down consumed a good week of time, and some amount of $$$ in parts orders from mouser and jameco to troubleshoot (parts that didn't solve the problem and which are shelved in the spare parts bin now). Marc was really good with email and helpful, but in the end I found (surprising to Marc) that different opamps made the output more quiet. One snag with the midi2cv is that it doesn't come with a PSU design, as it expects you to hook into your modular synth system's PSU (which of course is outside the scope of what I'm trying to do here)... This step added some uncertainty, especially when extra noise was heard. Just beware of this step if you're going to do anything similar. I wasn't hearing 60hz hum, rather it was high frequency noise (20mhz harmonics maybe?)...
The midi2cv controls the 202 as expected, and is very cool (much much cooler than that fairly limited Synhouse intergrated midi mod, and less money than the Kenton midi2cv),
The great thing about the 202 mods, I came to appreciate, is that the CV levels are _added_ to the slider positions, which is great because you can lay down complex organic backing tracks, and then when you have a free hand, tweak the knobs, and then stop whenever you like to go on to another piece of gear and it returns to the organic backing track you programmed in... no more static boring 202 loops that require constant attention during livePA sets.
As a closing note, the 202 now has some very modern control features while delivering a super fat monosynth sound. In addition, this 202 is still able to function exactly like a stock 202 when all the toggles are in the down position. A good fallback if this synth is ever sold, or if someone wanted to add batteries and take the 202 to the beach for a quick break.
Done!
Sexy final shot - includes custom white lettering on top
Midi2CV
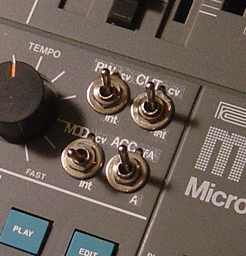
Close up of the modded front panel switches
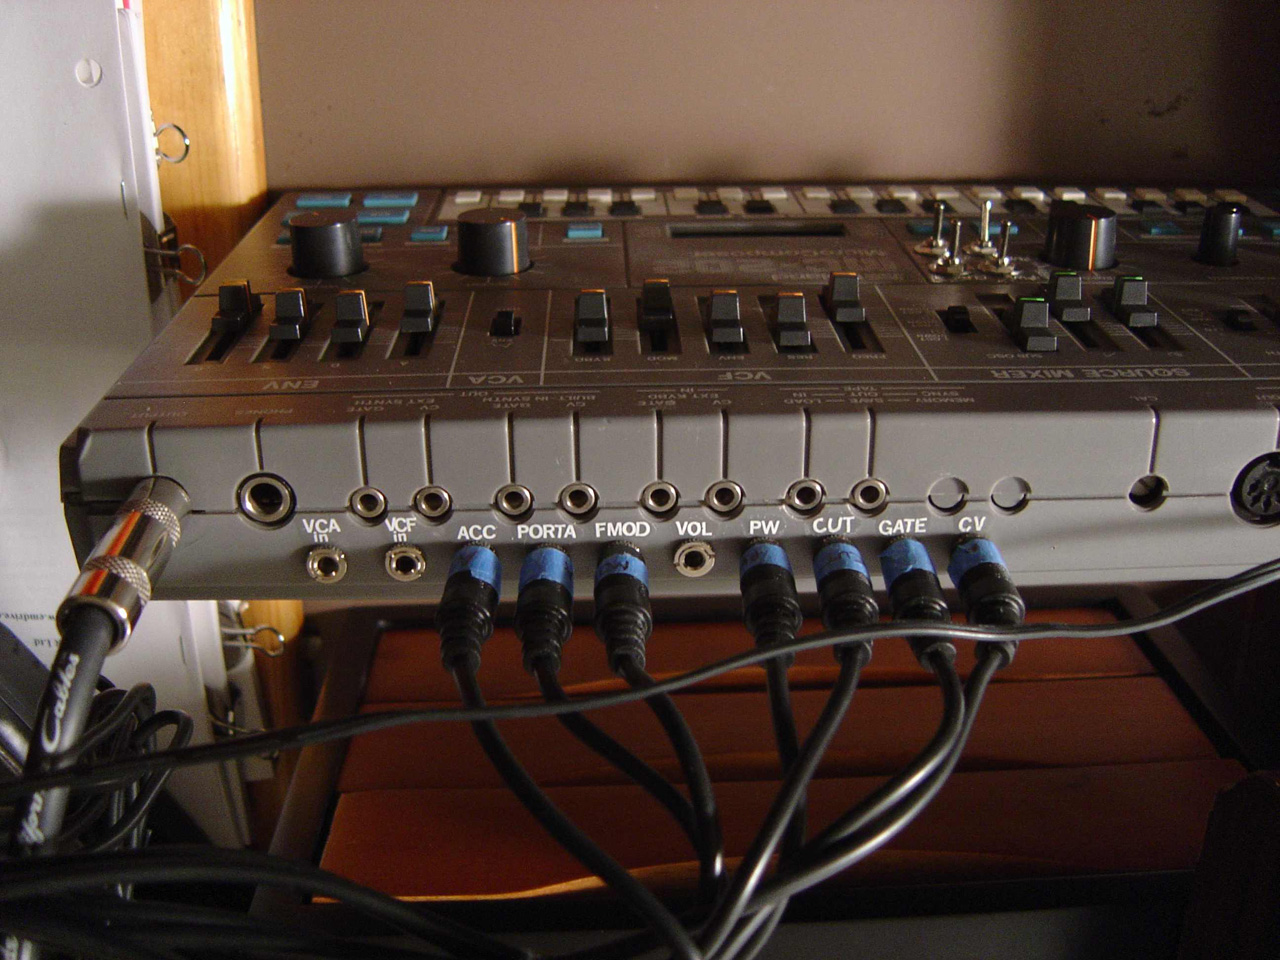
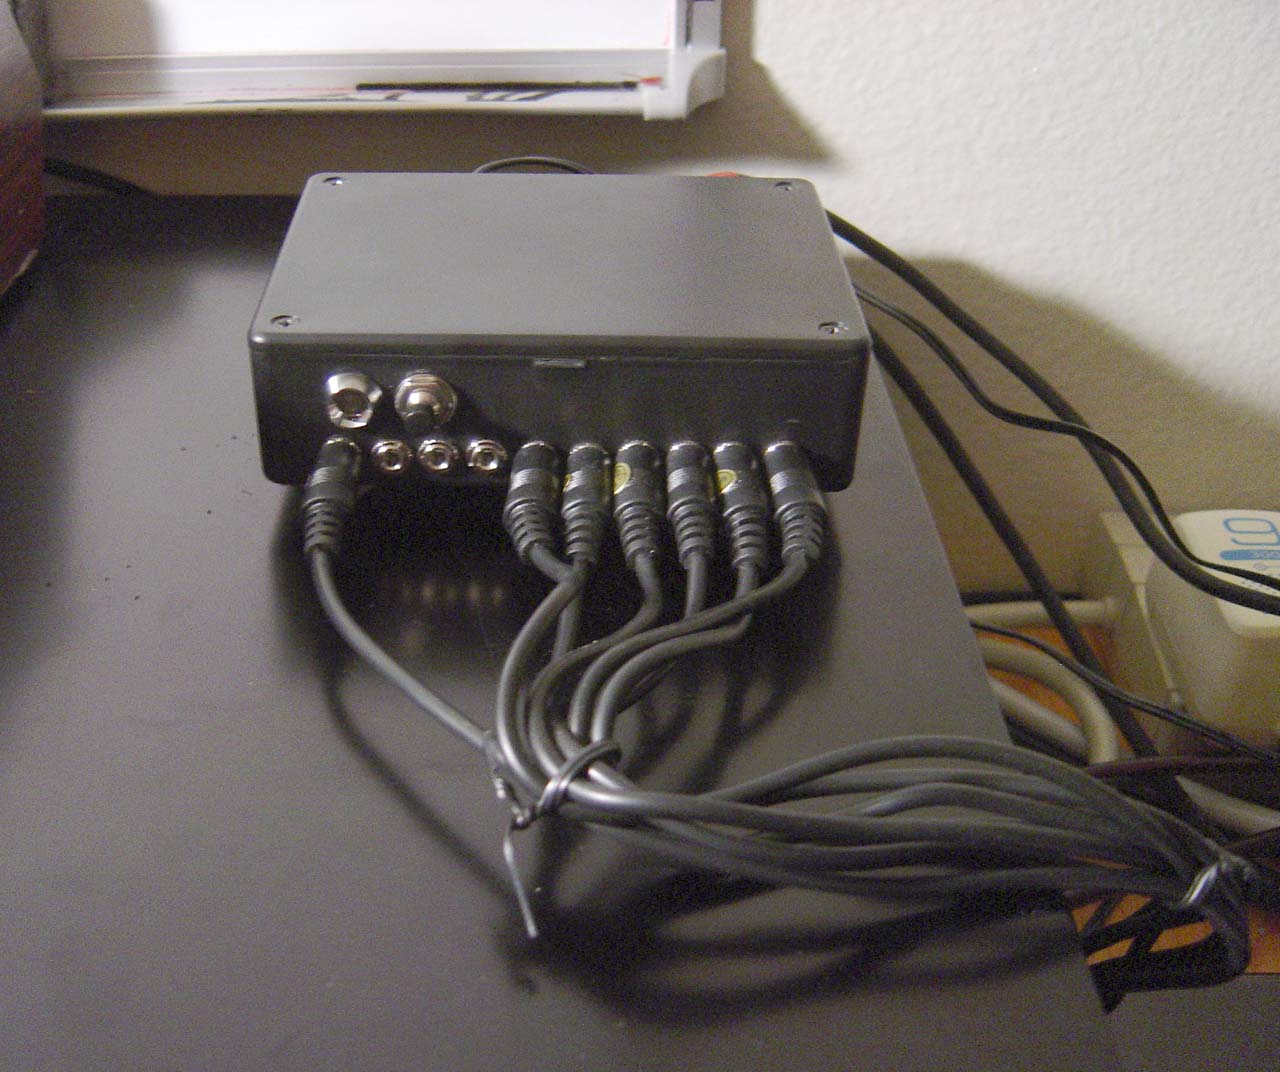
Final back panel cv/gate jacks
More Info - Further Reading
- - vintagesynth listing:

- - hyperreal
- - emusician review
- - 202 hack software
- - MC-202 at wikipedia
- - Cykong's 202 mod great stuff.
- - Bareille MCV876